
DreamHost is one of the oldest web hosting companies that has been in business since 1997. It offers shared web hosting, VPS hosting, WordPress hosting, etc. WordPress.org recommends DreamHost.
Shared Hosting Plan is the best choice for beginners. If you are planning to buy the shared hosting plan from DreamHost, you are in the right place. In this post, I’ll be sharing how to sign up for DreamHost with 40% discount.
What Will You Get With DreamHost Shared Hosting Plan?
- Free Domain Name – You will get a free domain name.
- 100% Uptime Guarantee – You won’t face any downtime.
- Auto-Updates – You’ll get every update automatically.
- Unlimited Domains – You can host domains as much as you want.
- Unlimited MySQL Databases- Unlimited users with unlimited MySQL host names.
- Unlimited Bandwidth and Disk space – You don’t need to care about storage.
- Unlimited Email.
- WordPress 1-Click Installation.
- Great Support and much more.
So those are some noticeable features of DreamHost. Now let’s see how to get started with DreamHost web hosting.
How to Sign Up for DreamHost WebHosting
Step 1: Go to DreamHost
Just click on this link, Dreamhost Promo Link, to get started with Dreamhost with 40% discount. Then click on “Get Started Now” button.

Step 2: Enter Email Address and Password
On the next page, you need to enter your email address and password to create your shared hosting account. Then click on “Continue” button.

However, you will also notice that DreamHost Promo Code “DREAMSAVINGS50” has been added automatically to the right header. This promo code will save $50 of you.

Step 3: Choose a Domain Name
Then you need to choose a domain name. DreamHost offers a free domain name with free domain privacy for the first year.
Enter your desired domain name and click on “Continue”.

Step 4: Choose Your DreamHost Shared Hosting Plan
Dreamhost has 3 types of plans – 3 Years, 1 Year and Monthly Plan. You will get $50 off for 3 years and 1 year plan. I’d recommend you to go with 1-year plan. Then click on “Continue” button.

Step 5: Choose Addition Hosting Option
Dreamhost offers MySQL VPS, which will cost you $15 per month. You can ignore this. Just keep the box unchecked and click on “Continue”.

Step 6: Provide Your Information and Complete the Payment
Then enter your personal information and credit card information. DreamHost doesn’t allow you to make first payment through Paypal. But you can pay through Paypal later.
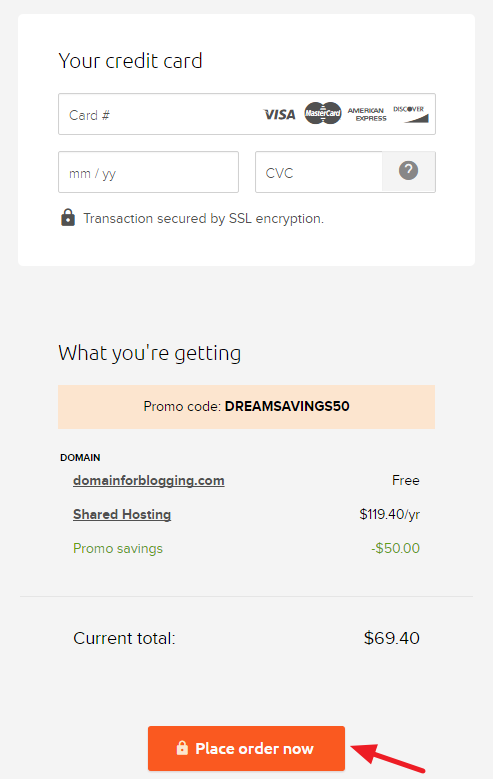
Click on “Place order now” button and complete the payment. That’s it. You are done.
Do let us know if you have faced any difficulties in buying web hosting from DreamHost. And if you found this post useful, help me by sharing this post on Facebook, Twitter, or Google+.
Leave a Reply