

Images make posts easier to read and remember, but large images are the most common reason WordPress sites load slowly. Slow pages hurt your Core Web Vitals, your rankings, and your readers’ patience.
The fix is to compress your images without visible quality loss, and the easiest way is a plugin. In this guide I will show you how to optimize WordPress images with Smush (formerly WP Smush), one of the most popular free image optimizers with more than 1 million active installs, plus three good alternatives.
What Is Smush?
Smush is a free image optimization plugin by WPMU DEV. It compresses, resizes, and lazy loads your images automatically, with a Pro version for extra features. Here is what the free version does:
- Lossless and lossy compression: shrink images with little or no visible quality loss.
- Automatic compression: optimizes every new image you upload.
- Bulk Smush: optimizes the images already in your media library.
- Resize large images: scales down huge uploads to a maximum width and height.
- Directory Smush: optimizes images outside the media library, such as in theme folders.
- Lazy load: loads images only when visitors scroll to them.
- Wrong-size detection: highlights images that are bigger than they need to be.
How to Optimize Images With Smush (Step by Step)
Step 1: Install and Activate Smush
- In your WordPress dashboard, go to Plugins > Add New Plugin.
- Search for Smush.
- Click Install Now, then Activate.

New to plugins? See how to install a WordPress plugin.
Step 2: Run the Setup Wizard
Open the Smush menu. A quick setup wizard appears. The key settings:
- Automatic compression: turn this on so every new upload is optimized.
- Strip EXIF metadata: turn this on unless you run a photography blog; it removes camera data and saves space.
- Lazy load: turn on, unless your theme or caching plugin already lazy loads images.
- Usage data: optional.
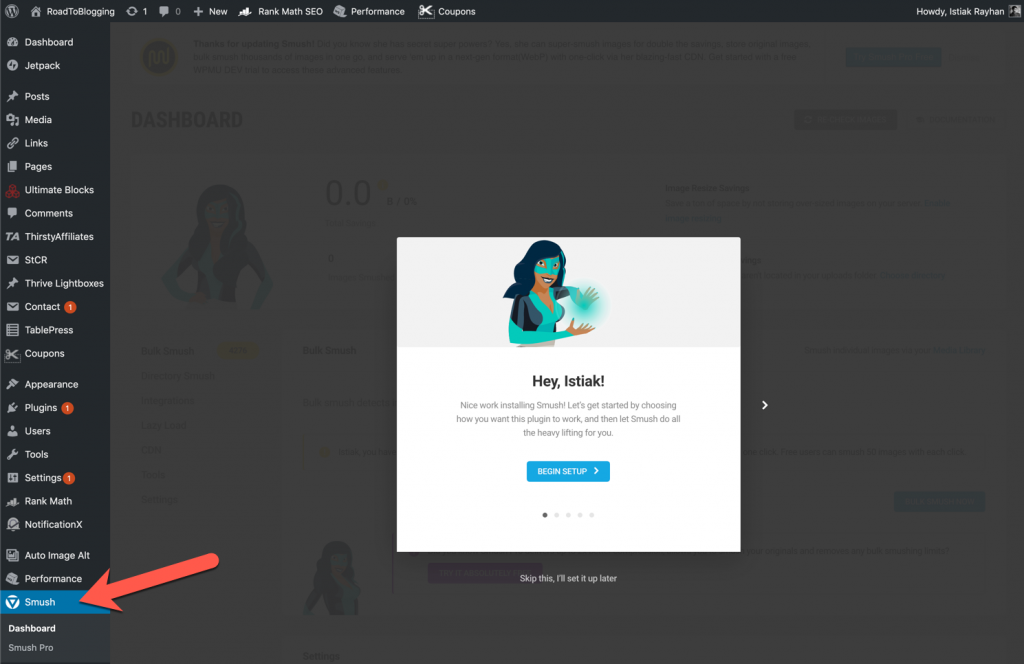
Step 3: Bulk Smush Your Existing Images
Go to the Bulk Smush section and click Bulk Smush. Smush optimizes every image in your media library, including all the thumbnail sizes WordPress creates. On a large library this can take a while, so leave the tab open.

Step 4: Choose Your Compression Level
In the settings, you can choose stronger (lossy) compression for bigger savings. For blogs, it is usually the best choice: the quality difference is hard to see, and pages load noticeably faster. Then let Smush handle new uploads automatically.
Step 5: Check Your Results
The dashboard shows how much space you saved. Test a post in PageSpeed Insights before and after; the “Improve image delivery” warnings should shrink.
Smush Pro: Do You Need It?
For most small blogs, the free version is enough. Pro is worth it if your site is image-heavy. It adds:
- WebP and AVIF conversion: serves modern formats that are much smaller than JPEG and PNG.
- Image CDN: delivers images from a global network of servers for faster loading worldwide.
- Automatic resizing: serves each image at exactly the size its container needs, fixing the “properly size images” warning.
- Faster bulk processing and support for larger files.
Smush Pro is also included in WPMU DEV’s memberships with their other plugins.
Other Image Optimization Plugins
1. ShortPixel

ShortPixel compresses images and PDFs, converts to WebP and AVIF, and now adds AI tools like SEO-friendly file renaming, upscaling, and background removal. It works on credits: the free plan includes a monthly quota, and you can buy more credits cheaply or get a one-time bundle. It is lightweight because compression happens on ShortPixel’s servers.
2. EWWW Image Optimizer

EWWW Image Optimizer, also used on more than 1 million sites, offers unlimited free optimization with no file size limit, free WebP conversion, lazy loading, and the ability to compress images on your own server. Premium plans add stronger compression, AVIF, a CDN, and a performance plugin.
3. Optimole

Optimole works differently: it processes images in the cloud and serves each visitor an image sized for their exact screen, in WebP or AVIF, through a CDN with 450+ locations. The free plan includes all features for sites with up to about 2,000 visits a month; bigger sites need a paid plan.
Tips to Keep Images Fast
- Resize images before uploading. A blog post rarely needs images wider than about 1,200 to 1,600 pixels.
- Use JPEG or WebP for photos and PNG or SVG for graphics with few colors.
- Do not lazy load the first image on the page (your featured image); it should load immediately.
- Add descriptive alt text to every image for accessibility and SEO.
Learn more in our guide to image SEO and our list of online image optimizers.
Frequently Asked Questions
Is Smush free?
Yes. The free version compresses, resizes, and lazy loads images. WebP and AVIF conversion, the CDN, and automatic resizing are Pro features.
Will Smush reduce image quality?
Lossless compression does not change quality at all. Lossy compression changes it slightly, usually invisibly, in exchange for much smaller files.
Can I use two image optimization plugins?
No. Use only one, or they may compress images twice and conflict with each other.
Leave a Reply